


Sometimes laptop owners need to reset the device to factory settings. For example, if the computer is sold or simply given to another person. In some cases, this solution will help to cope with the "slowdowns" of the system. The reset procedure varies depending on the operating system, laptop model and motherboard.
Below are instructions for restoring factory settings on devices running Windows and macOS.
When to reset laptop settings?
A factory reset is usually required in several situations:
- There was a software failure on the laptop: For instance, the laptop displays an error each time it boots up, leading to a reboot. If you encounter such a problem, it is recommended to check the system for viruses, cancel the latest updates and deactivate recently installed drivers. Try resetting only if the listed methods did not lead to the desired result.
- After purchasing a laptop, the device may have unlicensed software, third-party settings or firmware installed that can slow down its operation or cause crashes. We recommend resetting the laptop to factory settings immediately after purchase to mitigate future problems.
- Before selling a laptop, you can completely delete all data from the disk, including your personal files, using a reset. This way, you will exclude the possibility of your information falling into the hands of the future owner of the laptop.
- The laptop is very slow, but everything is in order with the components: Sometimes it is easier to "zero" the laptop than to look for the cause of the problems. In this case, a system reset is usually enough. Please note: applications installed after purchasing the laptop will disappear along with all data. You will have to reinstall them.
- Unsuccessful overclocking or laptop setup: The BIOS (UEFI) stores the hardware parameters of your laptop. Some laptops allow you to overclock the processor and video card. However, if you do something wrong, the laptop will simply stop loading. Resetting the BIOS will return safe settings. In this case, it is not necessary to reset the system.
What to save before resetting the system?
Before starting everything "from scratch", you need to make backup copies of the necessary data:
- Media files. Documents, photos, videos and music can be transferred to an external drive or to the cloud. For example, to Google Drive.
- Browser bookmarks. They will also disappear from "Favorites". However, you can save them by exporting them to an external drive. Most browsers have an "Export bookmarks" function. It will create a bookmarks file on the specified drive. You can restore bookmarks from the same file using the "Import bookmarks" function of the browser.
- Passwords. All saved passwords will disappear after the reset. Make sure they are written down somewhere (or you simply remember them). You can also use a password manager.
- Settings and programs. Resetting the system will delete all applications installed after purchasing the laptop. Make sure that you can reinstall them. Sometimes you may need to copy the key file to an external drive or pre-deactivate the application.
If you have an external drive of suitable capacity, it is worth making a backup of the entire contents of the laptop. Then you will definitely not lose any important information.
How to reset your Windows device
There are 2 options here
1. From Windows itself:
If the system is still running, then everything is quite simple.
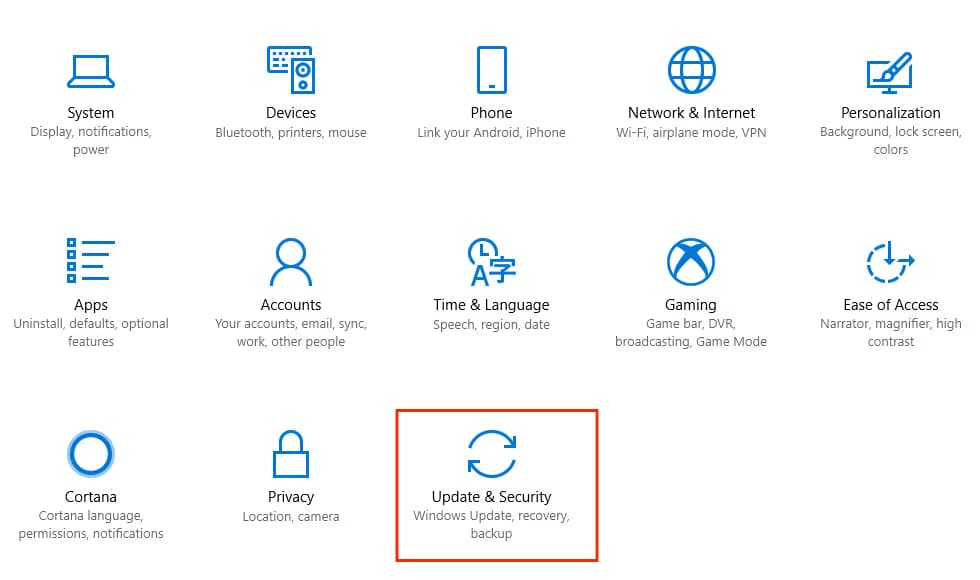
Open the Start menu. Click on the gear icon to get to "Settings". Select the "Update & Security" section.
Go to the "Recovery" tab. Click "Get started" in the "Reset this PC" section.
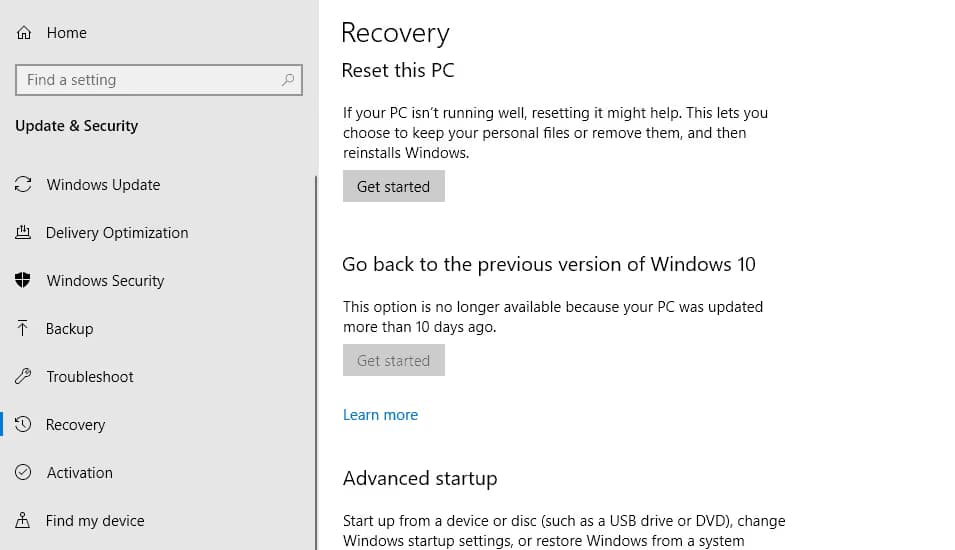
A window will appear with two options: "Keep my files" or "Remove everything". If you need to clean everything up, choose the second option.
Follow the instructions. Windows will show several warnings and prompt you to start the process. After that, the laptop will reboot. The system reinstallation will begin.
2. Using WinRE:
What if, for some reason, recovery from Windows itself is impossible? No problem. Most modern laptops have a special hidden partition on the hard drive. WinRE (Windows Recovery Environment) is stored there.
Next, we will describe this recovery procedure for different popular laptop brands.
IMPORTANT: Remove all devices and flash drives from the laptop ports before resetting it.
ACER:

- Restart the laptop;
- Immediately after turning on, hold down the Alt key and press F10 until the recovery menu appears;
- If the system asks for a password, enter "000000";
- In the recovery menu, select Factory Reset and run;
- Follow the instructions of the recovery utility.
ASUS:
- Restart the laptop;
- Immediately after turning it on, press F2 until the BIOS loads;
- Go to the Boot tab and set the value to Disabled next to the Boot Booster item;
- Exit the BIOS and save the settings (Save changes and exit).
DELL:
HP:

- Restart the laptop;
- Press F11 until the Recovery Manager utility starts;
- Select System Recovery and start the procedure;
- An automatic reset to factory settings will occur.
Lenovo:

MSI:

- Restart your laptop;
- Press F3 until the Windows Boot Manager utility starts;
- Select Windows Setup [EMS Enabled] and press Enter;
- Launch MSI Recovery Manager and follow the instructions.
Samsung:

- Restart your laptop;
- Press F4 until the Samsung Recovery Solution utility starts;
- Go to the Restore section;
- Go to Complete Restore;
- Select the Computer Initial Status restore point and start the procedure;
- The factory reset will be performed automatically.
Toshiba:

- Restart your laptop;
- Press and hold the 0 key until the laptop starts beeping;
- The recovery utility will launch — follow its instructions.
How to reset settings using BIOS or UEFI:
To reset the settings of laptop components that have been changed using software, you can use the built-in software - BIOS or UEFI.
To reset the BIOS settings, you must first enter them. This is also done with a certain key combination during boot:
| Laptop Brand | Key(s) |
|---|---|
| ASUS | F2, Del or F9 |
| Acer | F1, F2, Ctrl+Alt+Esc |
| Lenovo, Dell, Sony, Toshiba, Panasonic, Fujitsu | F2 or Del |
| HP | F10 or Esc |
| Samsung | F2, F8, F12 or Del |
Once in the BIOS, look for the factory reset option, which may appear as
- "Load setup defaults"
- "Reset to default"
- "Reset to default settings"
- "Reset to factory settings" or something similar.
This option is usually in the "Exit" section of the menu. Selecting it will return all settings to their default state.
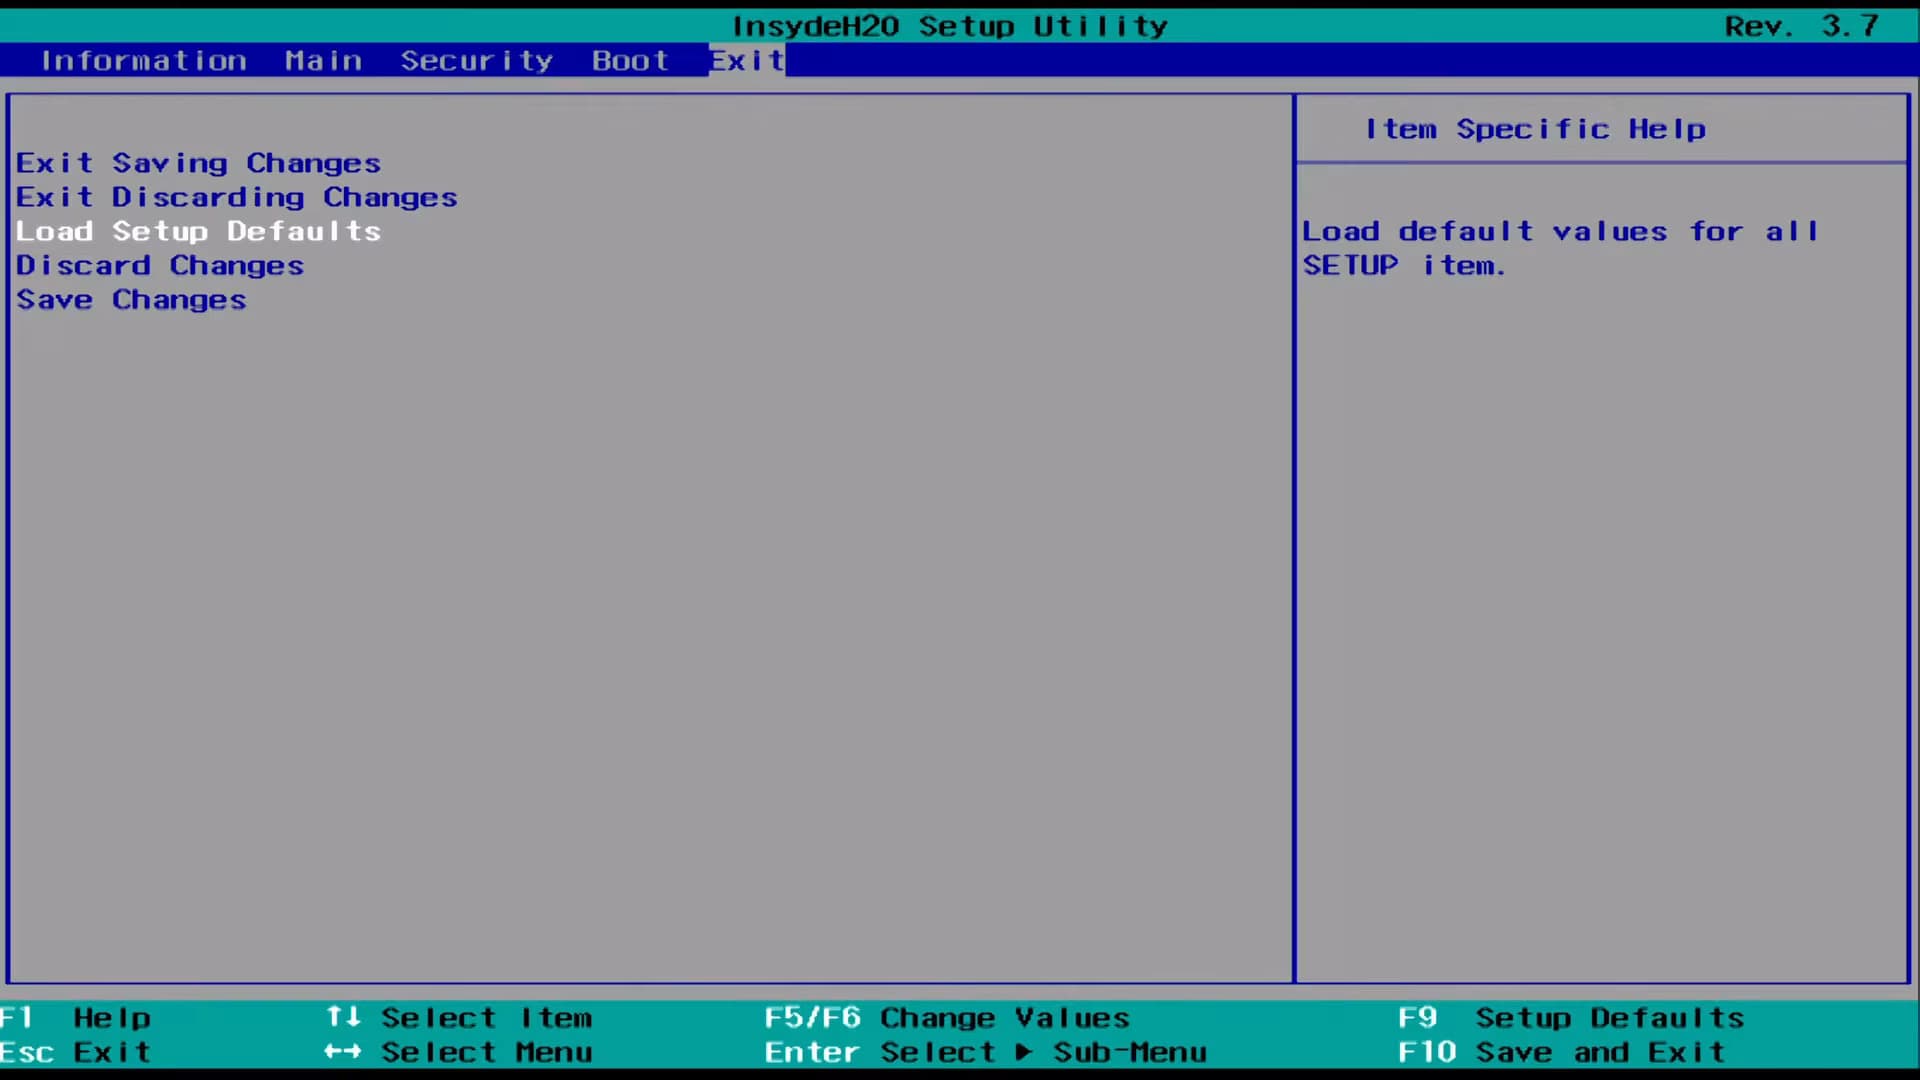
Then select "Save Changes & Exit" to save your changes and restart your laptop.
How to factory reset a MacBook
Before proceeding, back up your data using the built-in Time Machine utility to make restoring your files easier. Unlike Windows, macOS requires an internet connection to restore your system, so make sure you have one.
Back up your data: Use system tools to prevent the loss of important files. You can store them in the cloud or transfer them to an external hard drive. Make sure the external storage has at least the same capacity as the internal SSD.
- Connect an external hard drive.
- Click the Apple icon in the top left corner of the menu.
- Select "System Preferences" and open the Time Machine tab.
- Click "Select Backup Disk..." and choose the external drive.
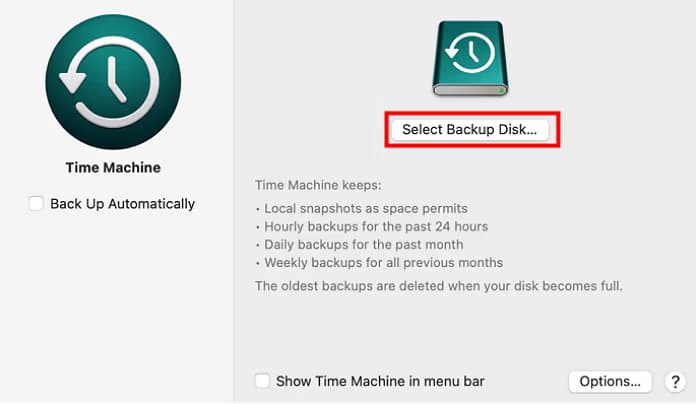
- Next, the system will offer to format the selected drive - to confirm, click the "Erase" button, and macOS will begin backing up the data.
Once you have the backup, you can restore your system in two ways:
Erase all content and settings
- Click the Apple icon in the top left corner.
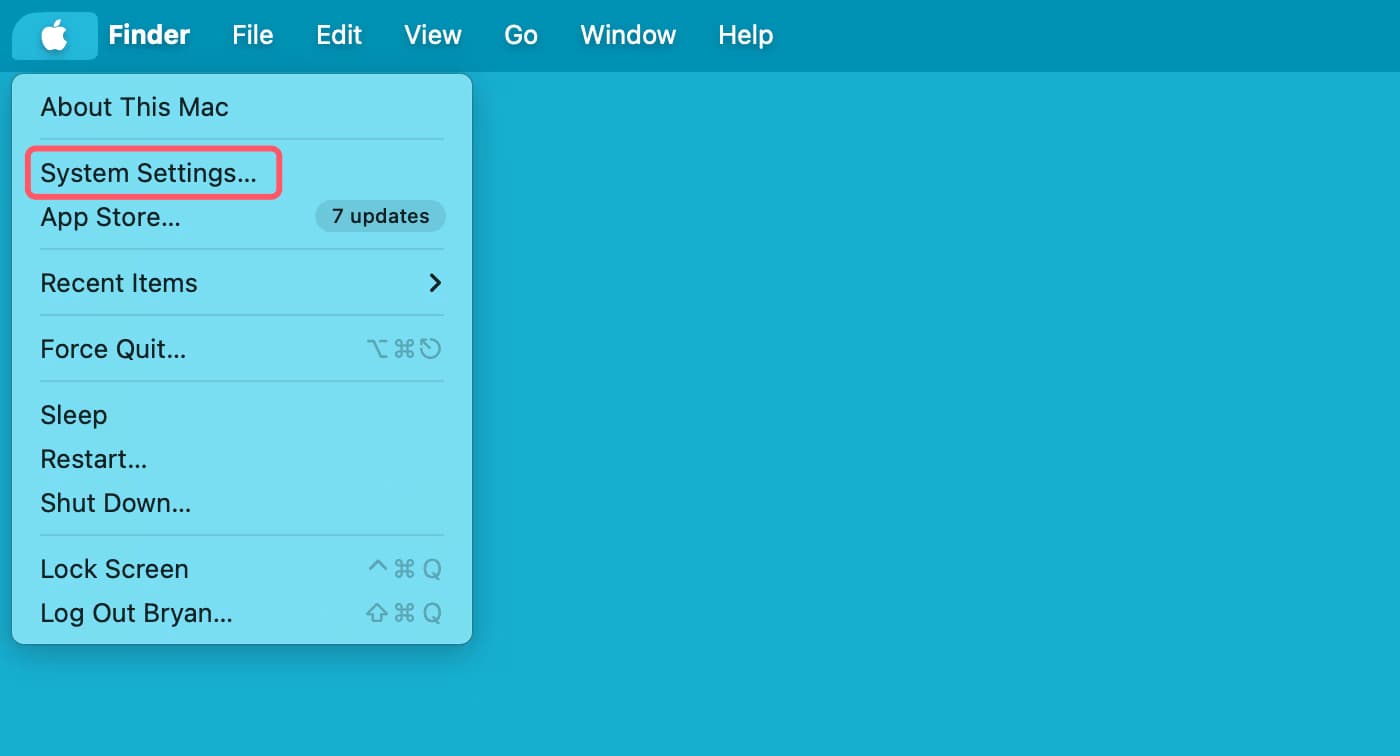
- From the drop-down menu, select "System Settings..." and open "General".
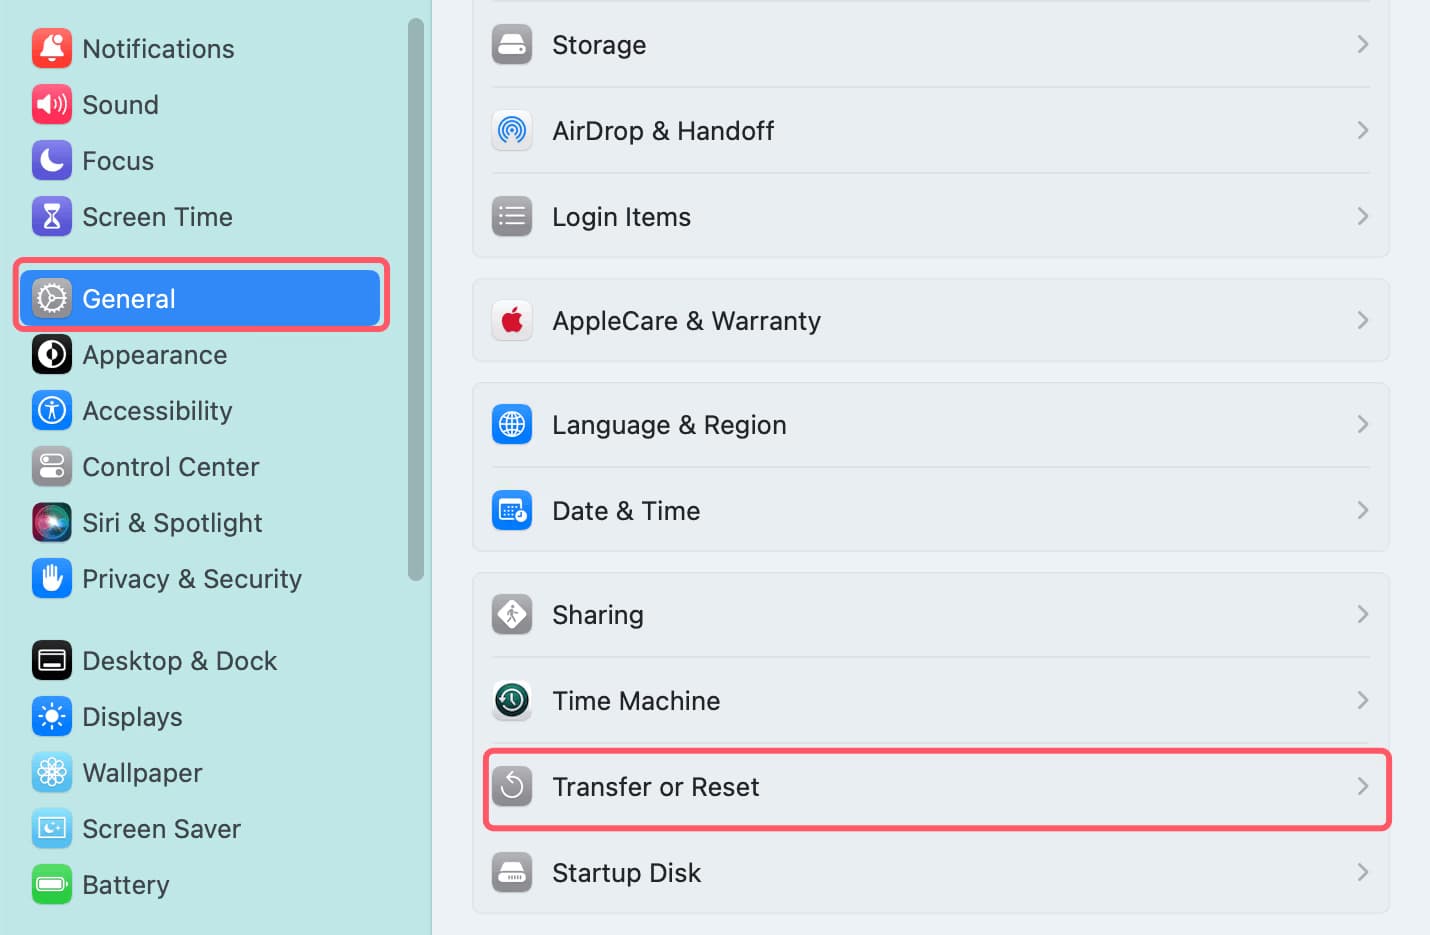
- Under "General", choose "Transfer or Reset".
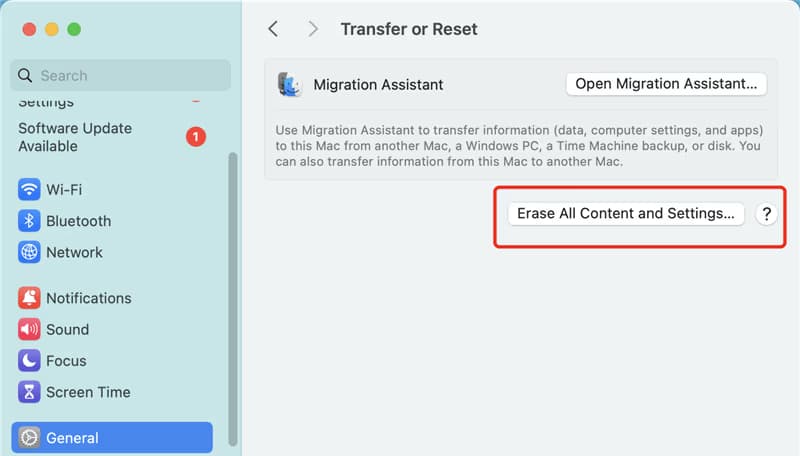
- Under "Transfer and Reset", click "Erase All Content and Settings".
IMPORTANT: You'll need to enter your system account password.
- A warning will appear about the information that will be deleted; click "Continue".
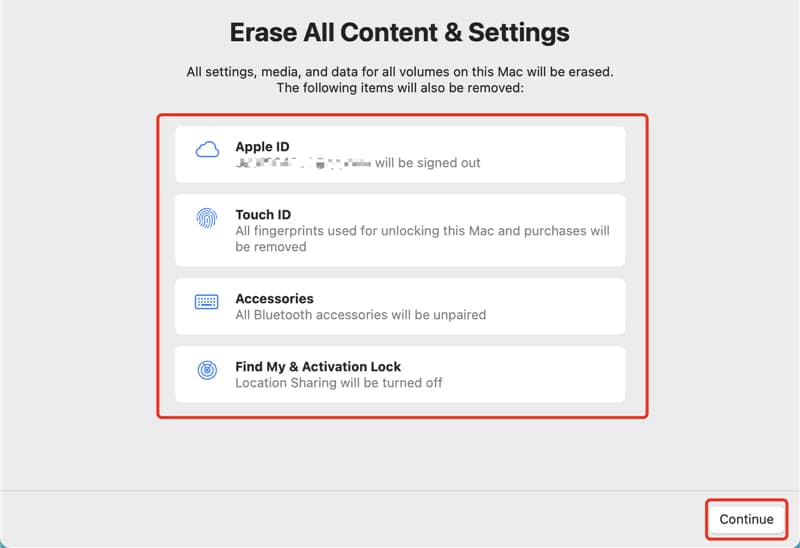
- The last step requires confirmation with your Apple ID password. Enter the password, click "Continue", and your MacBook will be reset to factory settings.
Reinstalling macOS from scratch
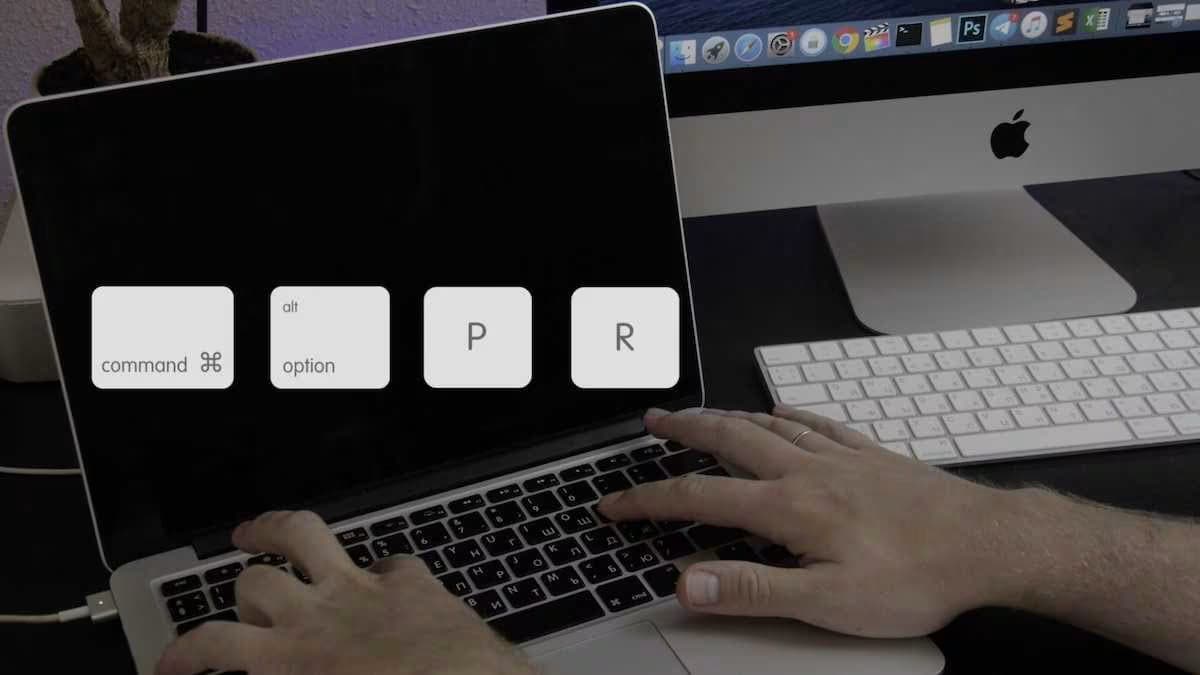
- Upon restart, hold down Command + Option + P + R until the Apple logo appears (this may take up to 30 seconds). Restart after seeing the login screen.
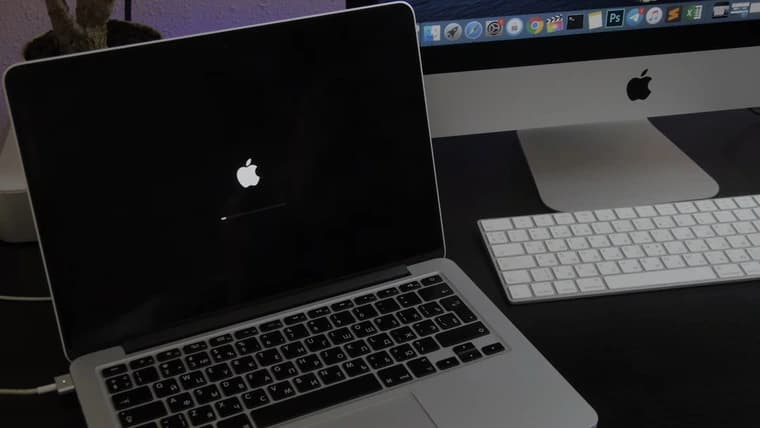
- Enter recovery mode by holding down Command + R until you see the Apple logo with a loading bar.
- Once restarted, enter your password. In the window that appears, select "Disk Utility".

- Choose the disk where macOS is installed and click "Erase".
- Finally, select "Reinstall macOS" to download and install the operating system again, after which your Mac will be as good as new.
Comments